Tuesday, July 17, 2012

Electrical Diagram

I worked out this wiring diagram for the Woodsman. There will be an on board battery charger/tender so that when I am plugged into shore power the battery will be charged and maintained. In the past I have some experience with deep cycle batteries from trying to maintain batteries for an electric trolling motor. You don't want to let them set over the winter without being connected to a tender. The tender (or minder) will monitor the voltage on the battery and add charge as needed which preserves the life of the battery and allows you to get maximum charge cycles and performance for the full life of the battery. Other than that the wiring will be pretty basic. There will be a master switch and old school 20A fuse to protect the 120V system as well as a GFCI breaker on one of the outlets for safety. Then a 40A breaker and master switch on the 12V circuit with a fuse box that has positions for 8 automotive fuses and a grounding bus. The battery will be in a box on the tongue of the trailer and the other components will be housed in a cabinet near the front of the trailer. I will show these in subsequent posts. 

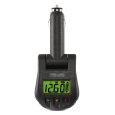
I checked into the meters I would need to install to have a constant read out of voltage and current. Although it would be nice to have these, I decided not to permanently install digital meters. I am using LEDs and florescent lighting to keep the current draw as low as possible. Mainly I would like an easy way to check the voltage to make sure I don't drain the battery too far which would affect its lifetime. I can do this with one of the devices shown below, they cost around $15. You just plug it into one of your 12V outlets to check the voltage at any time.


Sunday, July 8, 2012

Galley Cabinet Completed

Here is the completed upper cabinet of the galley (doors off). The shelves are made of 3/8 inch ply. They have a lip to keep items from falling off the shelves during transport. The lip is of 3/4 inch by 3/4 inch pine. I made a special cubby to hold my lantern.


I would like to point out a couple of things in the photo above that relate to wiring. Notice the left wall of the interior of the cabinet is a "false" wall that encloses the wires that come in from the ceiling and are routed into an electrical chase below the floor of the cabinet where they feed the 120V and 12V outlets of the galley. Notice also the small rectangle at the bottom center of the cabinet. This is an enclosure that covers wiring that is routed up out of the chase and through the back wall. This wiring will serve the cabin.

This is the cabinet just before I added the shelves. I took this picture so that you can see how the wires are routed before I covered them up.

The cabinetwork of the galley is finally complete.It took a lot more Saturdays than I thought it would take but I am very happy with the result. I'm excited about the next step of the build. In the next step I will be installing the inner lining of the ceiling in the cabin.

Sunday, July 1, 2012

Sliding Doors of Galley


I completed the sliding doors for the galley. Why sliding doors? Hinged cabinet doors won't work very well here because if you set something on the counter top then open a hinged door it will sweep it right off the counter. With sliding doors you can have something on the counter and still open the cabinet. The casing for the doors is made of ash and the sliding doors are of 3/8 inch ply. The bottom piece has two openings for the convenience outlets. One of the outlets will be wired with a 12V socket and the other will have a 120V GFI double outlet. 

The assembled casing for the sliding doors is shown on the upper left. On the upper right is the end view of the top and bottom sliding door slots set next to each other. As you can see the slots on the upper portion are deeper than the slots on the lower portion. 3/8 inch deep on the bottom and 5/8 inch deep on top. This is done so that you can insert and remove the doors by pushing them up into the top slot until the bottom clears the lower slot. After the finish is on I will rub a candle in the slots to deposit a little wax to make the doors slide smoothly.
The casing is fastened into the trailer using 3 1/2 inch screws that go through the wall from the outside into the side of the casing.