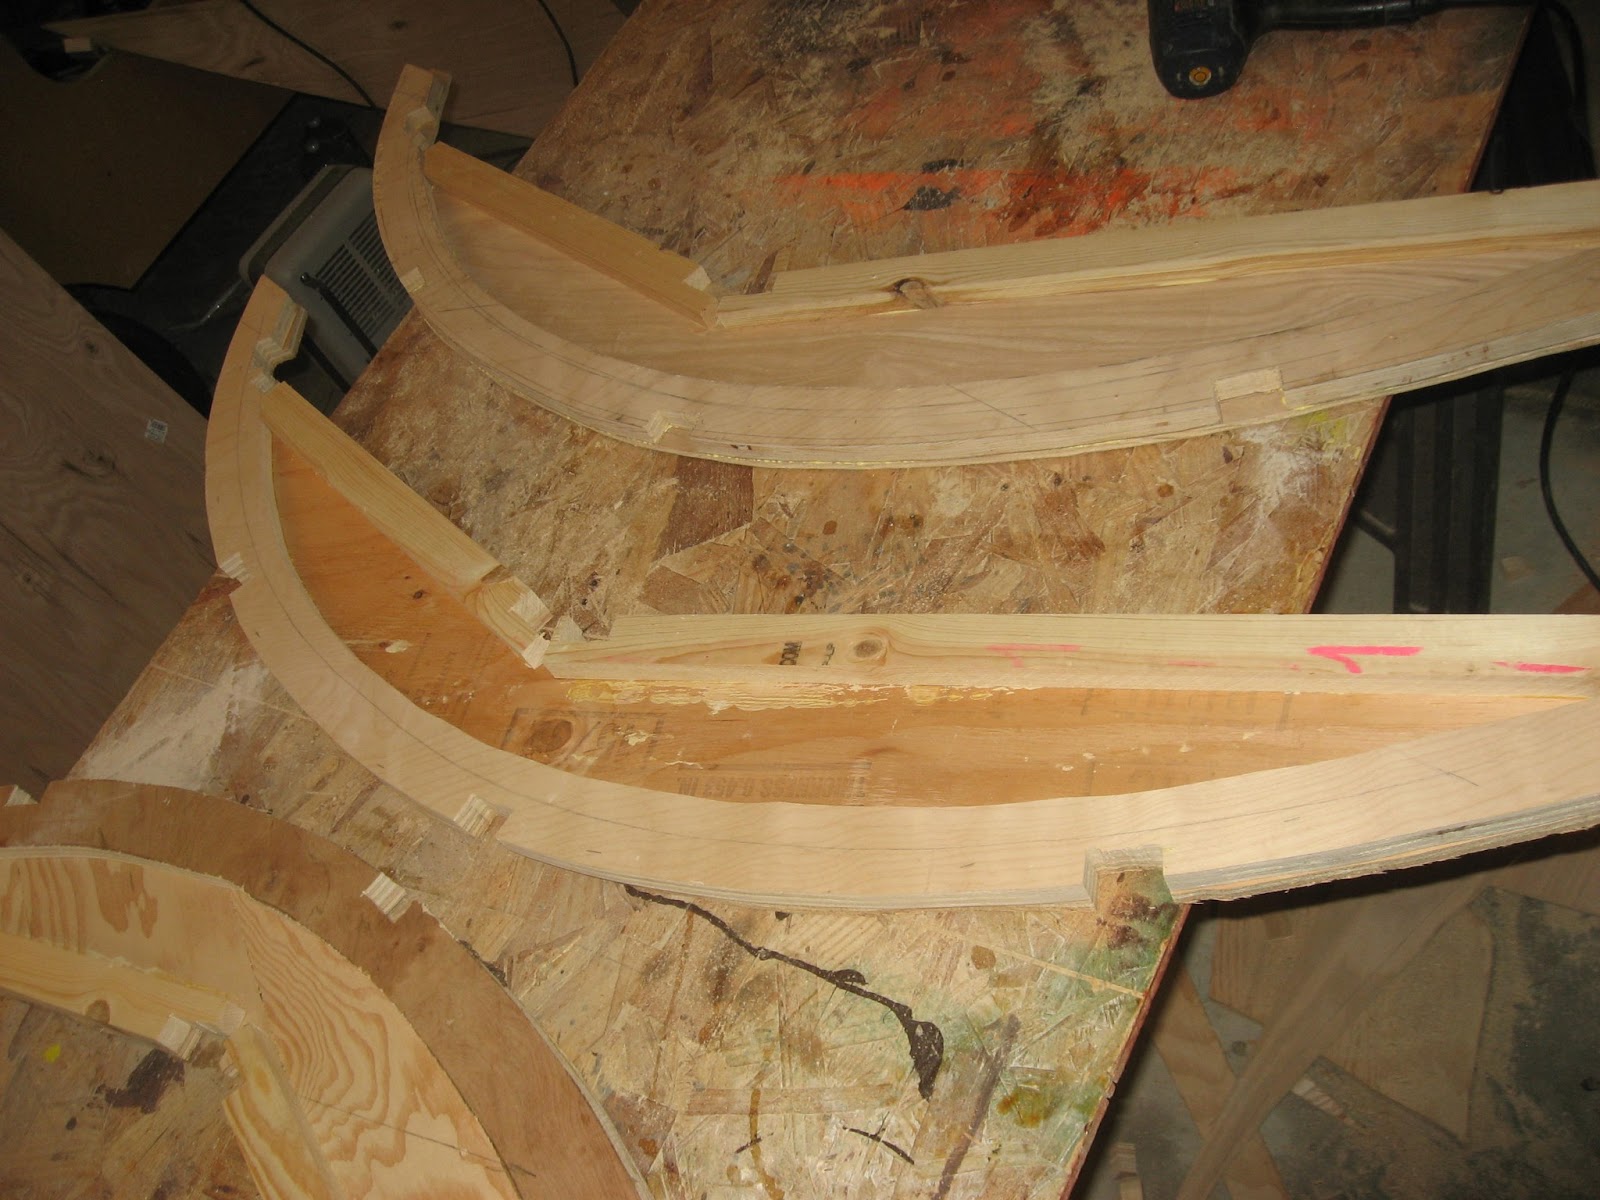

I have started on the galley hatch. At first I cut 4 spars from 3/4 inch plywood. I traced the curvature of the galley hatch onto the plywood allowing about 1/4 inch for the weather strip to seal the hatch. I cut the spars 2 inches wide. After I got them cut I started thinking about the bending stress that the spars would receive when I attach the outer plywood. Laying a spar on a flat surface with the convex side up and pressing down at the apex of the curve I could easily deform the spars by 1/2 inch. They were wooden springs! I knew that if I did not strengthen them they would deform during assembly and my hatch would no longer fit the curvature of the galley. In the pictures above you can see the remedy. I made plywood webs to turn the spars into trusses and attached 1x2 pine strips to the inside with screws and glue. This will give me a place to fasten the inner plywood panels of the hatch. If you click on the top left picture to blow it up you will see that I have cut notches on 16 inch centers for attaching horizontal members. I cut the end pieces of plywood without the notches so that from the end, when the hatch is up, you will see a solid panel of plywood.


The picture above shows the spars after they have been attached to the top and bottom rails of the hatch. I clamped it in place so that when I add the horizontal members I can cut them and place them in such a way that the hatch will fit perfectly in its space. I am allowing 1/8 inch of clearance on each side for the opening and closing of the hatch. I also have a 5/16 spacer clamped in place at the top to simulate the width of the hurricane hinge and a 3/16 spacer holding up the bottom rail to provide a little clearance at the bottom for opening and closing. This hatch design solves another problem that I previously didn't know quite how to solve. I have been worried about the drawers coming loose during travel. I used those little compression latches with two little plastic wheels that clamp on to a wedge when you close them but these are not very strong so I was wondering how to lock the drawers closed. In this design the inner plywood of the hatch will be about one inch away from the knobs of the drawers when the hatch is closed. By attaching small pieces of the foam to the inside of the hatch right were the knobs are I will be able to keep the drawers in place just by closing and latching the hatch. Next Saturday I should be able to get the rest of the hatch structure finished and with some luck I will get the exterior plywood bent onto the hatch as well. On the right I added a picture of the interior cabinets with stain and varnish. I also painted the internal walls.
No comments:
Post a Comment